 nginx处理前后端分离跨域问题
在微服务中,通常会使用前后端分离的方式进行开发和部署。由于前后端分开部署,属于不同的“资源”,因此前端调用后端API时可能会出现跨域问题,Cross-Origin Resource Sharing (CORS) (opens new window)。
这里,我们使用前后端分离的架构,使用nginx分别代理前端和后端微服务,分析和解决跨域问题。
# 前后端信息
微服务访问地址:
后端地址:http://192.168.122.130:8089(真实地址)
NGINX代理地址:
前端VIP:http://192.168.122.130(对外接口)
后端VIP:http://192.168.122.130:8080(对外接口)
# 前端服务
前端使用vue.js框架
//HelloWorld.vue

<template>
  <div class="hello">
    <p>后端地址:<input v-model="url"></p>
    <p>返回结果:{{ message }}</p>
    <div><a @click="getMethod">GET请求</a></div>
    <div><a @click="getMethodWithHeader">带自定义请求头的GET请求</a></div>
    <div><a @click="postMethod">POST请求</a></div>
    <div><a @click="putMethod">PUT请求</a></div>
    <div><a @click="deleteMethod">DELETE请求</a></div>
  </div>
</template>

<script>
import axios from 'axios';

export default {
  name: 'HelloWorld',

  data() {
    return {
      url: 'http://192.168.122.130:8080/',
      message: ''
    }
  },
  methods: {
    getMethod() {
      let that = this
      axios
        .get(this.url)
        .then(response => (that.message = response))
        .catch(function (error) {
          that.message = error
          console.log(error);
        });
    },
    getMethodWithHeader() {
      let that = this

      axios
        .get(this.url,
          {
            headers: { 'name': 'hello' }
          })
        .then(response => (that.message = response))
        .catch(function (error) {
          that.message = error
          console.log(error);
        });
    },
    postMethod() {
      let that = this

      axios
        .post(this.url)
        .then(response => (that.message = response))
        .catch(function (error) {
          that.message = error
          console.log(error);
        });
    },
    putMethod() {
      let that = this

      axios
        .put(this.url)
        .then(response => (that.message = response))
        .catch(function (error) {
          that.message = error
          console.log(error);
        });
    },
    deleteMethod() {
      let that = this

      axios
        .delete(this.url)
        .then(response => (that.message = response))
        .catch(function (error) {
          that.message = error
          console.log(error);
        });
    },
  },

}
</script>

<!-- Add "scoped" attribute to limit CSS to this component only -->
<style scoped>
a {
  color: #42b983;
  cursor: pointer;
}
</style>
2
3
4
5
6
7
8
9
10
11
12
13
14
15
16
17
18
19
20
21
22
23
24
25
26
27
28
29
30
31
32
33
34
35
36
37
38
39
40
41
42
43
44
45
46
47
48
49
50
51
52
53
54
55
56
57
58
59
60
61
62
63
64
65
66
67
68
69
70
71
72
73
74
75
76
77
78
79
80
81
82
83
84
85
86
87
88
89
90
91
92
93
94
95
96
97
# 后端服务
后端使用python的web框架fastpai
# main.py
from typing import Union

from fastapi import FastAPI

app = FastAPI()


@app.get("/")
def get_root():
    return {"请求类型": "GET"}


@app.post("/")
def post_root():
    return {"请求类型": "POST"}


@app.put("/")
def put_root():
    return {"请求类型": "PUT"}


@app.delete("/")
def delete_root():
    return {"请求类型": "DELETE"}


@app.get("/hello")
def hello():
    return {"hello": "world"}
2
3
4
5
6
7
8
9
10
11
12
13
14
15
16
17
18
19
20
21
22
23
24
25
26
27
28
29
30
31
32
启动:uvicorn main:app --host 0.0.0.0 --port 8089
# nginx配置
nginx proxy的配置方法:https://nginx.org/en/docs/http/ngx_http_proxy_module.html
# 前端配置
/etc/nginx/conf.d/frontend.conf
 server {
        listen       80 default_server;

        server_name  localhost;

        # 配置根目录的地址是以 nginx 下的 html 文件夹为根目录来查找的
        root /opt/frontend/dist;

        location / {
            try_files $uri $uri/ /index.html;
        }

        error_page   500 502 503 504  /50x.html;
        location = /50x.html {
            root   html;
        }
   }
2
3
4
5
6
7
8
9
10
11
12
13
14
15
16
17
18
# 后端配置
/etc/nginx/conf.d/backend.conf
server {
    listen       8080;
    server_name  backend;

    location / {
       proxy_pass       http://192.168.122.130:8089;
       proxy_set_header Host      $host;
       proxy_set_header X-Real-IP $remote_addr;
    }
}
2
3
4
5
6
7
8
9
10
# 解决跨域问题
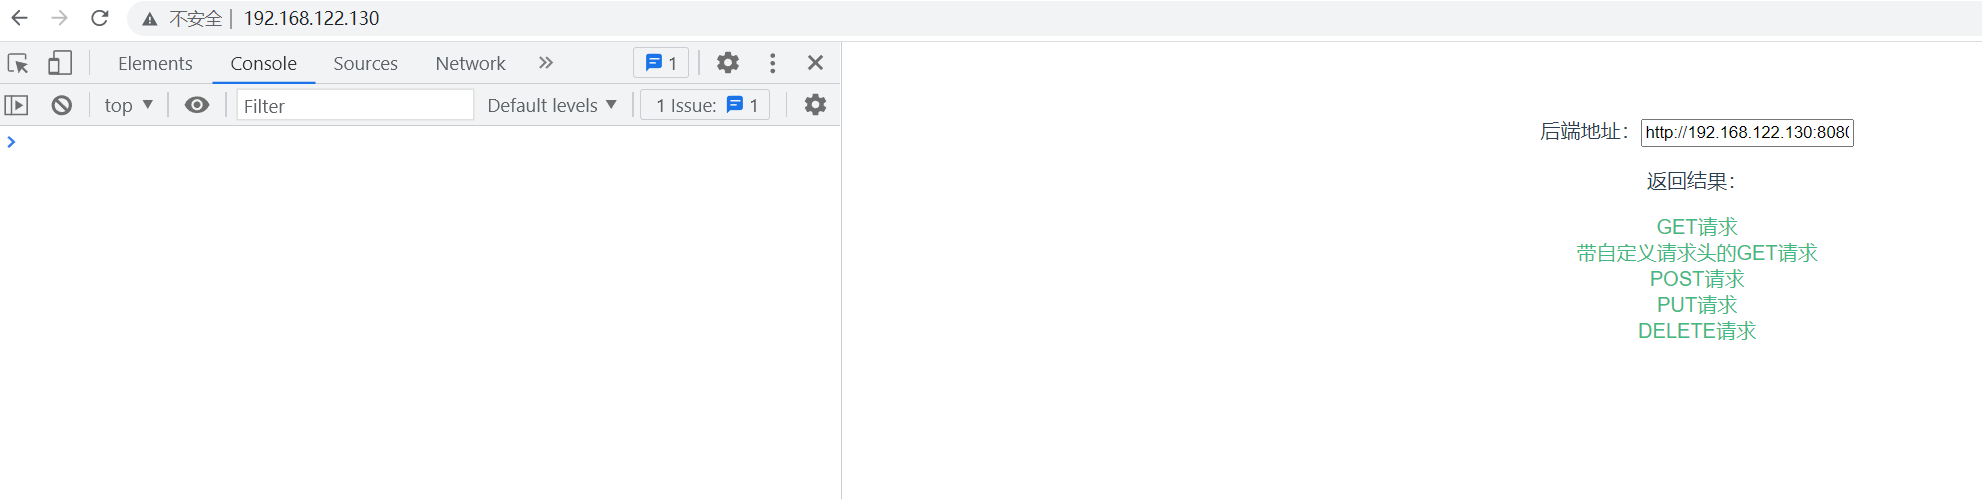
配置好nginx之后,重启nginx。并使用浏览器访问前端地址:http://192.168.122.130/,同时按F12打开debug模式。
# 解决No 'Access-Control-Allow-Origin' header
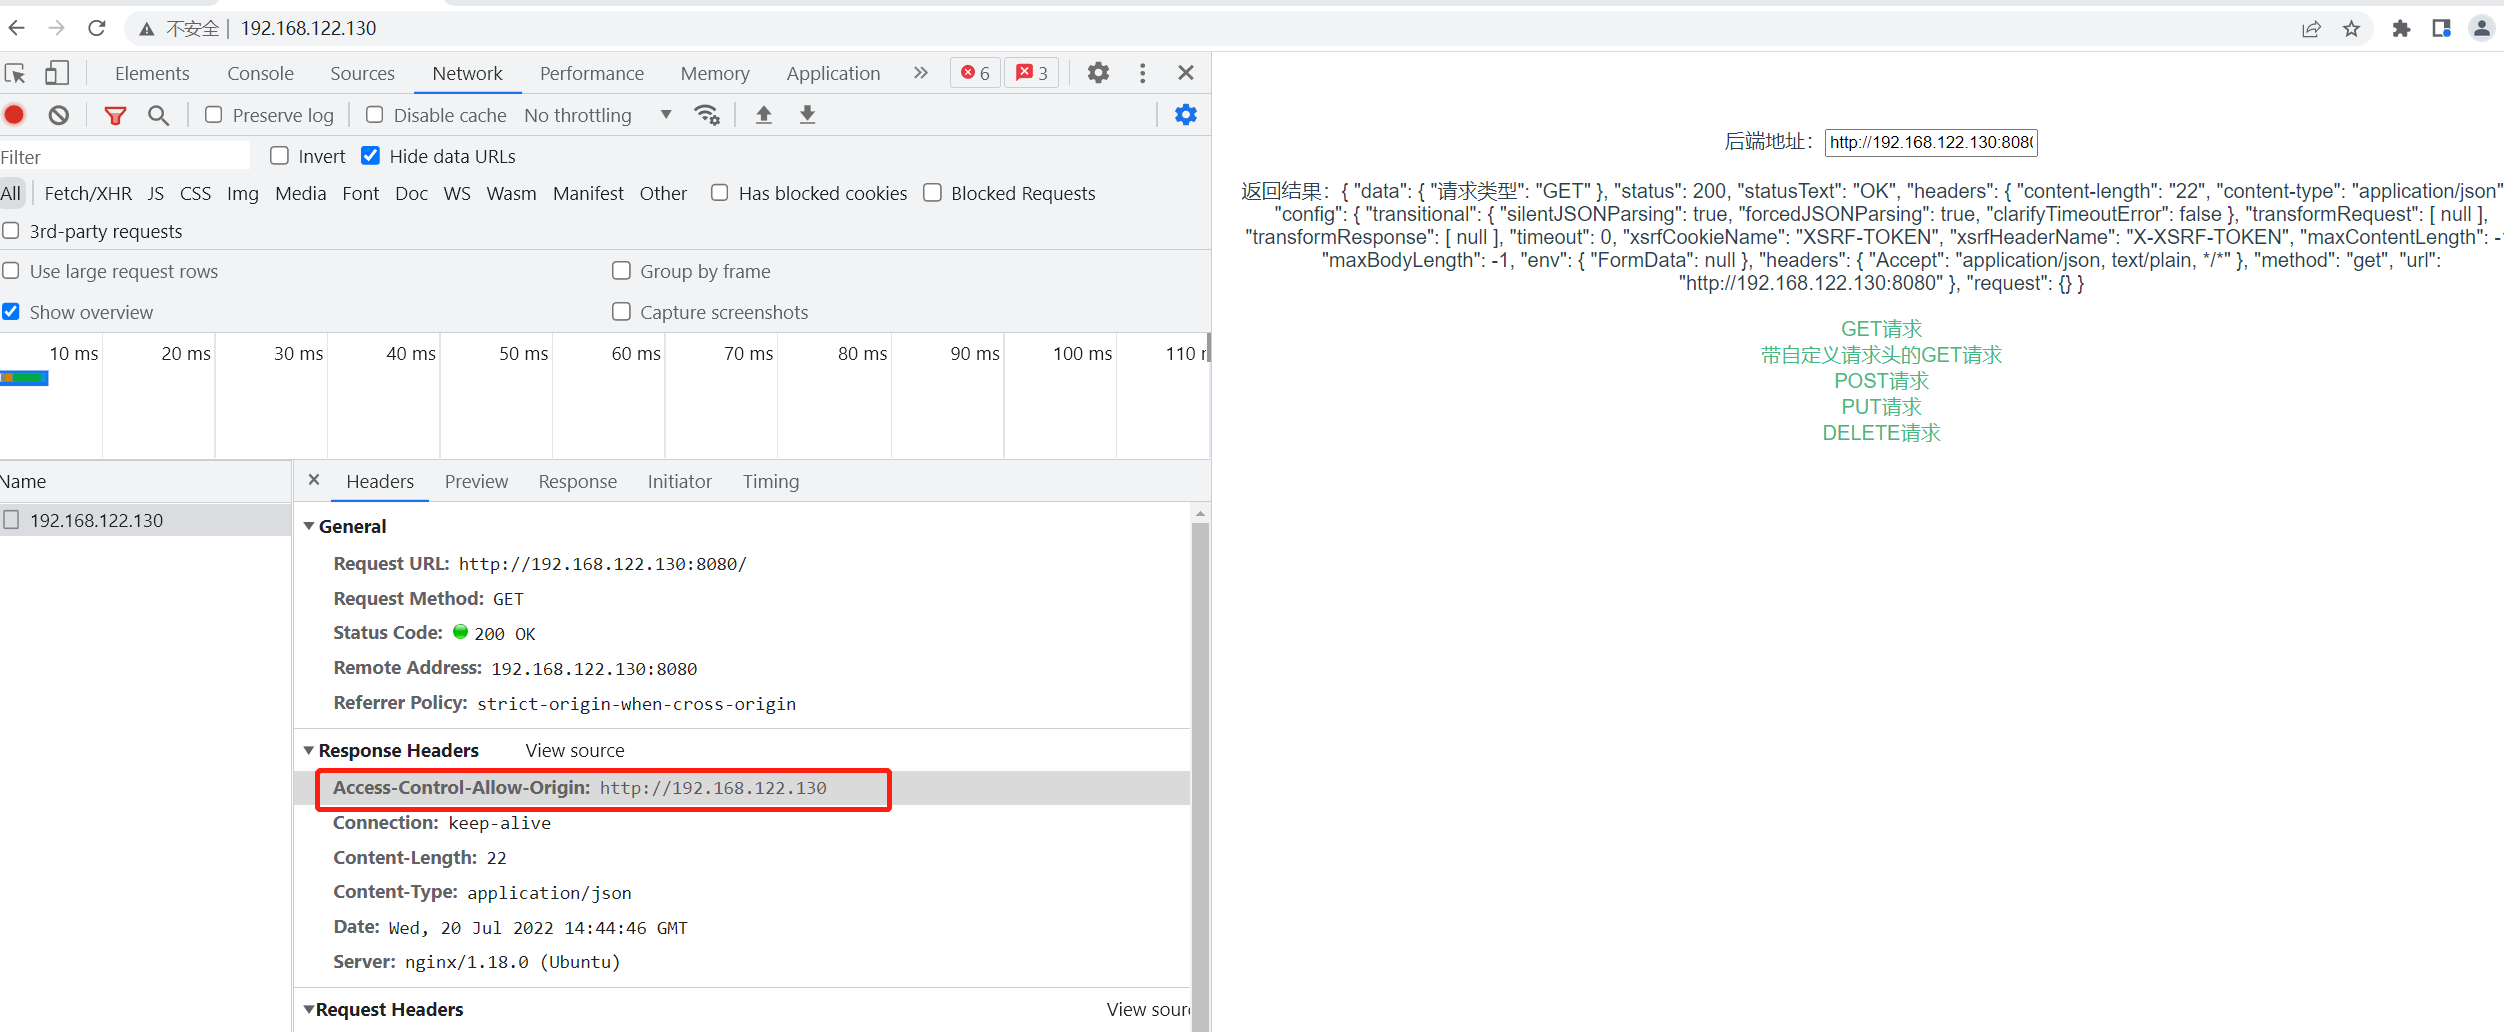
点击“GET请求”,前端向后端发起请求,会发现请求错误,错误信息如下:
Access to XMLHttpRequest at 'http://192.168.122.130:8080/' from origin 'http://192.168.122.130' has been blocked by CORS policy: No 'Access-Control-Allow-Origin' header is present on the requested resource.
这是因为没有添加跨域请求头。
- 跨域请求头描述请参见Access-Control-Allow-Origin (opens new window)
- nginx添加请求头请参考ngx_http_headers_module (opens new window)。
修改nginx配置文件:/etc/nginx/conf.d/backend.conf
server {
    listen       8080;
    server_name  backend;

    location / {
       proxy_pass       http://192.168.122.130:8089;
       proxy_set_header Host      $host;
       proxy_set_header X-Real-IP $remote_addr;
       # 允许http://192.168.122.130访问后端资源(注意不要添加端口号,因为http://192.168.122.130默认使用的是80端口号,如果是其他端口号就需要添加)
       add_header Access-Control-Allow-Origin 'http://192.168.122.130' always;
    }
}
2
3
4
5
6
7
8
9
10
11
12
13
重启nginx,此时前端调用后端接口正常。
# 解决preflight request
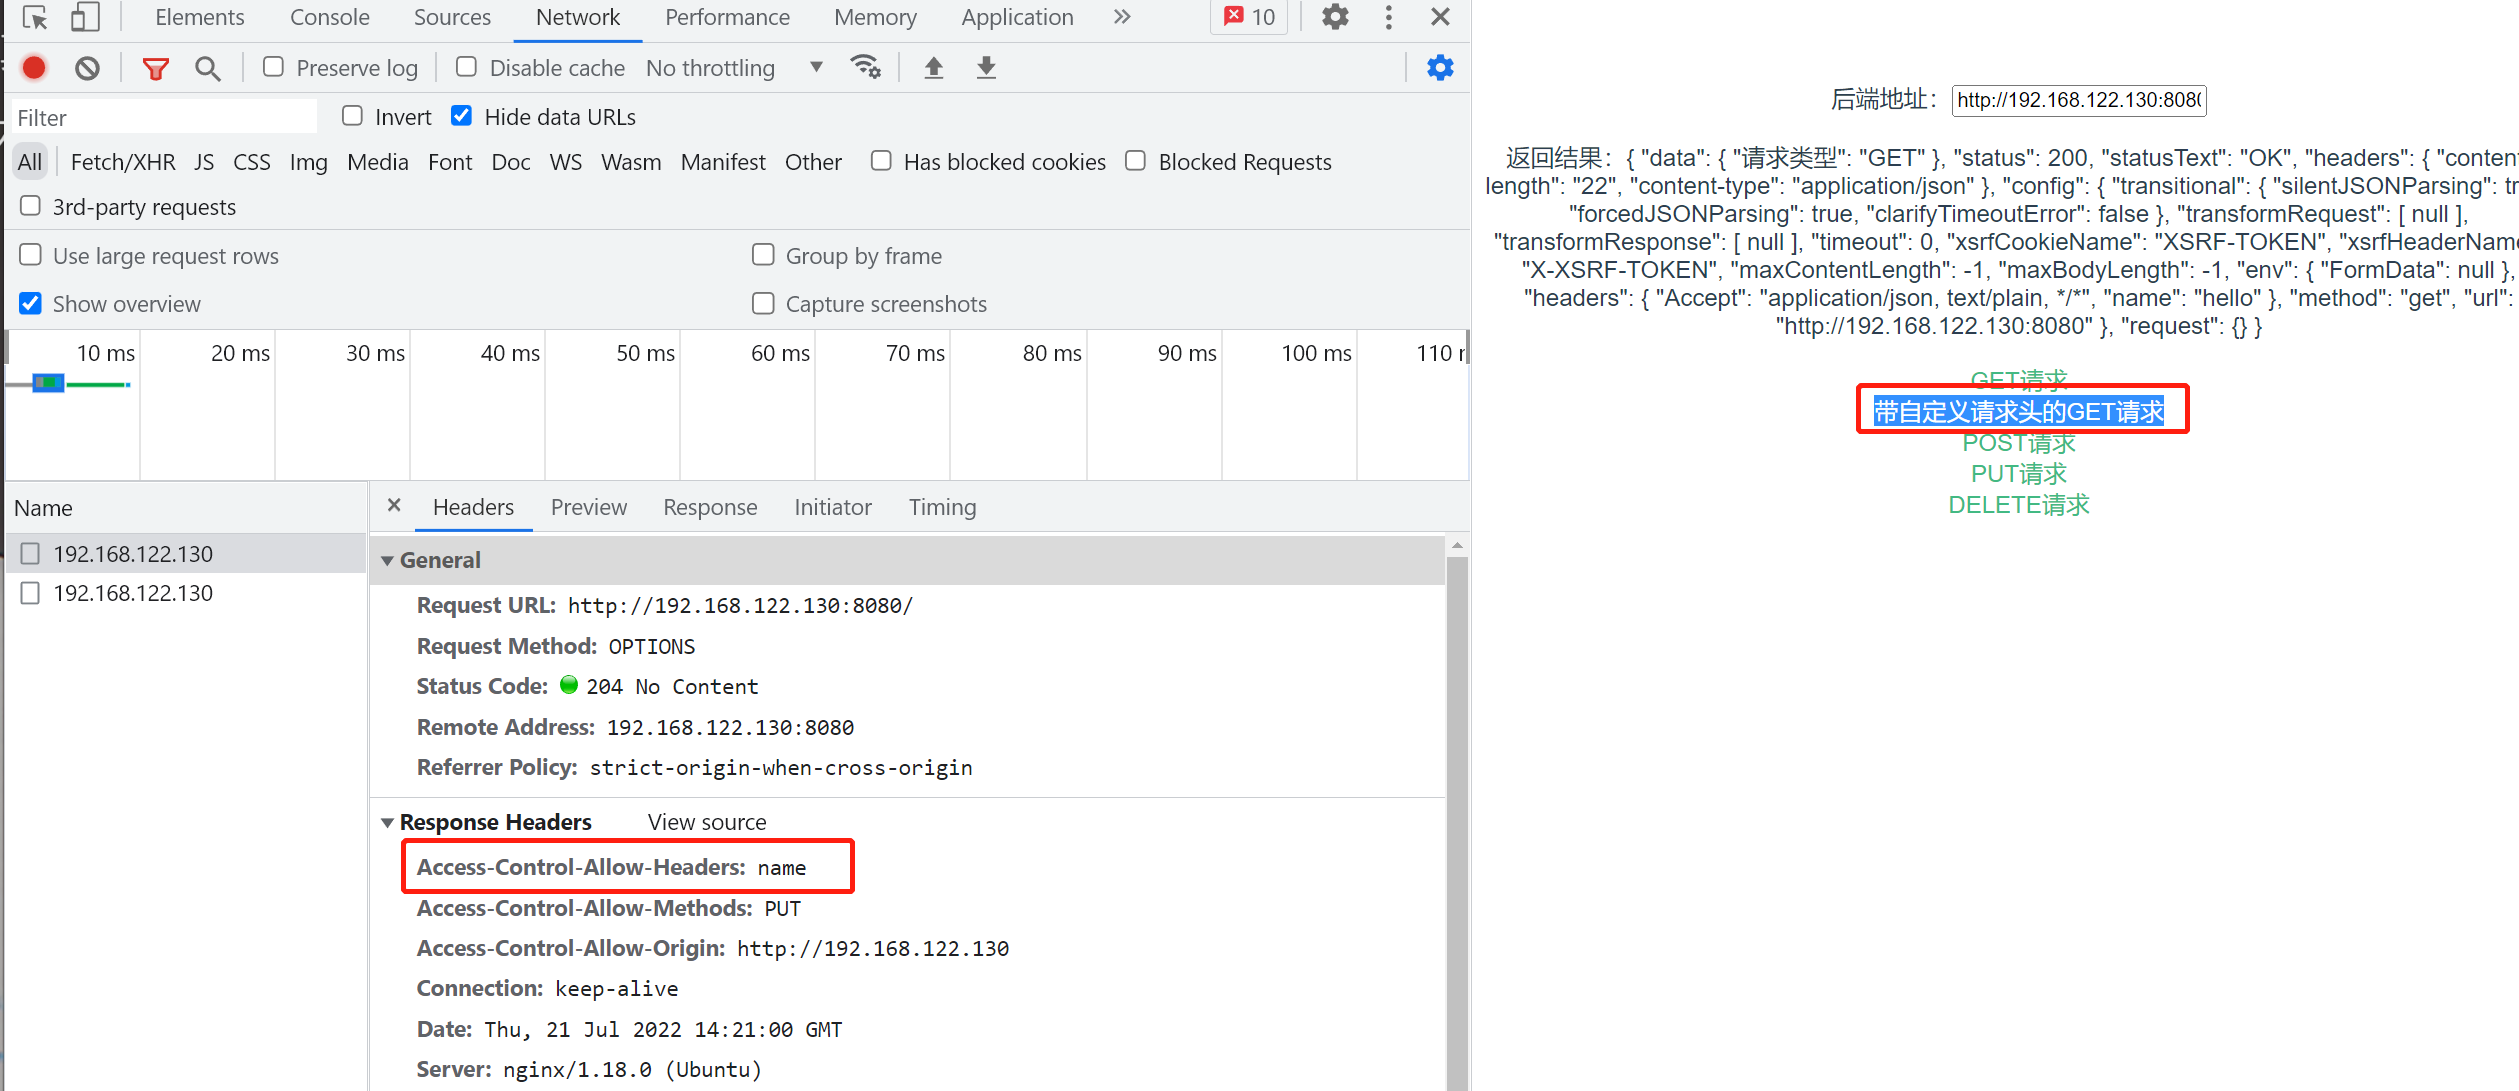
现在让我们尝试其他请求方法。依次点击“带自定义请求头的GET请求”,“POST请求”,“PUT请求”和“DELETE请求”后,可以发现,只有“POST请求“能够正常访问,其他请求都会失败,同时浏览器向后端发起了两个请求。
浏览器报错:
192.168.122.130/:1 Access to XMLHttpRequest at 'http://192.168.122.130:8080/' from origin 'http://192.168.122.130' has been blocked by CORS policy: Response to preflight request doesn't pass access control check: It does not have HTTP ok status.
后端服务器的日志:
INFO:     192.168.122.130:35376 - "OPTIONS / HTTP/1.0" 405 Method Not Allowed
INFO:     192.168.122.130:35380 - "POST / HTTP/1.0" 200 OK
INFO:     192.168.122.130:35382 - "OPTIONS / HTTP/1.0" 405 Method Not Allowed
INFO:     192.168.122.130:35384 - "OPTIONS / HTTP/1.0" 405 Method Not Allowed
2
3
4
nginx的日志:
192.168.122.1 - - [20/Jul/2022:15:33:25 +0000] "GET / HTTP/1.1" 200 22 "http://192.168.122.130/" "Mozilla/5.0 (Windows NT 10.0; Win64; x64) AppleWebKit/537.36 (KHTML, like Gecko) Chrome/103.0.0.0 Safari/537.36"
192.168.122.1 - - [20/Jul/2022:15:33:26 +0000] "OPTIONS / HTTP/1.1" 405 31 "http://192.168.122.130/" "Mozilla/5.0 (Windows NT 10.0; Win64; x64) AppleWebKit/537.36 (KHTML, like Gecko) Chrome/103.0.0.0 Safari/537.36"
192.168.122.1 - - [20/Jul/2022:15:33:27 +0000] "POST / HTTP/1.1" 200 23 "http://192.168.122.130/" "Mozilla/5.0 (Windows NT 10.0; Win64; x64) AppleWebKit/537.36 (KHTML, like Gecko) Chrome/103.0.0.0 Safari/537.36"
192.168.122.1 - - [20/Jul/2022:15:33:28 +0000] "OPTIONS / HTTP/1.1" 405 31 "http://192.168.122.130/" "Mozilla/5.0 (Windows NT 10.0; Win64; x64) AppleWebKit/537.36 (KHTML, like Gecko) Chrome/103.0.0.0 Safari/537.36"
192.168.122.1 - - [20/Jul/2022:15:33:29 +0000] "OPTIONS / HTTP/1.1" 405 31 "http://192.168.122.130/" "Mozilla/5.0 (Windows NT 10.0; Win64; x64) AppleWebKit/537.36 (KHTML, like Gecko) Chrome/103.0.0.0 Safari/537.36"
2
3
4
5
从日志中可以发现,“带自定义请求头的GET请求“,”PUT请求“和”DELETE请求“都向后端发起了OPTIONS请求。
这个OPTIONS其实是一个Preflight request (opens new window)。
A CORS preflight request is a CORS request that checks to see if the CORS protocol is understood and a server is aware using specific methods and headers.
It is an OPTIONS request, using three HTTP request headers: Access-Control-Request-Method, Access-Control-Request-Headers, and the Origin header.
这里的“POST请求“和”GET请求“属于simple requests (opens new window),因此不会有Preflight request,其他请求因为带了复杂的请求头或会修改后端服务的资源,所以需要发起Preflight request判断后端服务是否允许这些操作。
修改nginx配置文件,处理Preflight request
server {
    listen       8080;
    server_name  backend;

    location / {
       proxy_pass       http://192.168.122.130:8089;
       proxy_set_header Host      $host;
       proxy_set_header X-Real-IP $remote_addr;
       # 允许http://192.168.122.130:80访问后端资源
       add_header Access-Control-Allow-Origin 'http://192.168.122.130';
       if ($request_method = 'OPTIONS') {
          # 允许http://192.168.122.130访问后端资源
          add_header Access-Control-Allow-Origin 'http://192.168.122.130';
          # 允许http://192.168.122.130使用GET和PUT访问后端资源
          add_header Access-Control-Allow-Methods 'PUT';
          return 204;
       }
    }
}
2
3
4
5
6
7
8
9
10
11
12
13
14
15
16
17
18
19
20
backend.conf配置里添加了对OPTIONS方法的处理,如果前端发起OPTIONS请求,就返回204状态码,同时返回Access-Control-Allow-Origin和Access-Control-Allow-Methods响应头。
add_header Access-Control-Allow-Methods 'PUT';只允许前端使用GET、POST和PUT方式对后端服务发起请求,GET和POST属于simple requests,所以默认允许访问。
现在,可以点击“PUT请求”可以正常访问了,但是“带自定义请求头的GET请求”和“DELETE请求”还不能正常访问,因为响应头Access-Control-Allow-Methods没有添加DELETE方法。
# 解决Request header field问题
“带自定义请求头的GET请求”不能正常,是因为“带自定义请求头的GET请求”添加了自定义请求头name。
Access to XMLHttpRequest at 'http://192.168.122.130:8080/' from origin 'http://192.168.122.130' has been blocked by CORS policy: Request header field name is not allowed by Access-Control-Allow-Headers in preflight response.
修改nginx配置文件
server {
    listen       8080;
    server_name  backend;

    location / {
       proxy_pass       http://192.168.122.130:8089;
       proxy_set_header Host      $host;
       proxy_set_header X-Real-IP $remote_addr;
       # 允许http://192.168.122.130:80访问后端资源
       add_header Access-Control-Allow-Origin 'http://192.168.122.130';
       if ($request_method = 'OPTIONS') {
          add_header Access-Control-Allow-Origin 'http://192.168.122.130';
          # 允许http://192.168.122.130使用GET和PUT访问后端资源
          add_header Access-Control-Allow-Methods 'PUT';
          # 允许http://192.168.122.130使用请求头name访问后端资源
          add_header Access-Control-Allow-Headers 'name';
          return 204;
       }
    }
}
2
3
4
5
6
7
8
9
10
11
12
13
14
15
16
17
18
19
20
重启nginx,现在“带自定义请求头的GET请求”可以正常访问了。
好啦,现在基本解决了前后端的跨域问题,如果还遇到其他额外问题,都可以在MDN (opens new window)和nginx (opens new window)上找到答案。
# 参考
跨域问题可以在MDN (opens new window)中找到;nginx配置可以在nginx官网查看。
- nginx反向代理:https://nginx.org/en/docs/http/ngx_http_proxy_module.html
- nginx添加请求头:https://nginx.org/en/docs/http/ngx_http_headers_module.html
- CORS:https://developer.mozilla.org/en-US/docs/Web/HTTP/CORS
- Access-Control-Allow-Headers:https://developer.mozilla.org/en-US/docs/Web/HTTP/Headers/Access-Control-Allow-Origin
- Access-Control-Allow-Methods:https://developer.mozilla.org/en-US/docs/Web/HTTP/Headers/Access-Control-Allow-Methods
- Access-Control-Allow-Methods:https://developer.mozilla.org/en-US/docs/Web/HTTP/Headers/Access-Control-Allow-Methods
- vue:https://cn.vuejs.org/v2/guide/index.html
- fastapi:https://fastapi.tiangolo.com